Last night I had my first ever nail painting party with my sister Laura and our girlfriends Faye, Faye and Caz. It was the perfect start to my weekend
We started the night with chinese food and wine and ended the night with perfectly painted nails and more wine!
I couldnt have wished for better hand and nail models, we all really enjoyed the night and I was pleased that my nail painting skills are not just reserved for doing my own nails.
First up was little sis Laura. It is Laura and Ashley's 2nd Wedding Anniversary tomorrow so we designed her nails to match the lovely new dress she is wearing when her hubby takes her out for a nice meal to celebrate. As if, this time two years ago 30 of us were in the Dominican Republic for the wedding of the year!?!
We picked a base of Color Club Nomadic Nude. Quite possibly the most frustrating formula I have ever tried to work with and I am seriously considering ejecting this polish from my collection for good. That said it was a great colour to match with Lauras dress as seen in the close up of the pattern below.
I then taped off chevron tips and painted them in Barry M Cobalt Blue. To add the finishing touch I then stuck one small black flat backed pearl onto each nail.
Please excuse these pictures I took them on my iPhone and am really wishing I hadn't as the quality is not great and I can't crop them as I would normally :-(.
Next up is Faye B...
For this cute little manicure I started with a base of Barry M Navy which is such a beautiful polish and definately features in my current top 10. I then stamped the bow tips using Konad plate M56 and Konad White stamping polish. For the finishing touches I added dots using Barry M Matt White.
Then we have Faye H...
Faye is starting a new job today that does not allow her to wear nail polish (boo hiss!) so we decided to experiment with clashing colours on Faye as we knew she would have to remove them almost straight away.
This is three coats of No 7 Pinky Pure as a base and then my favourite flower print, the large roses from BM 323 stamped in Konad Red. I thought that pink and red looked really good together - they clashed but only in a good eye catching kind of way :-).
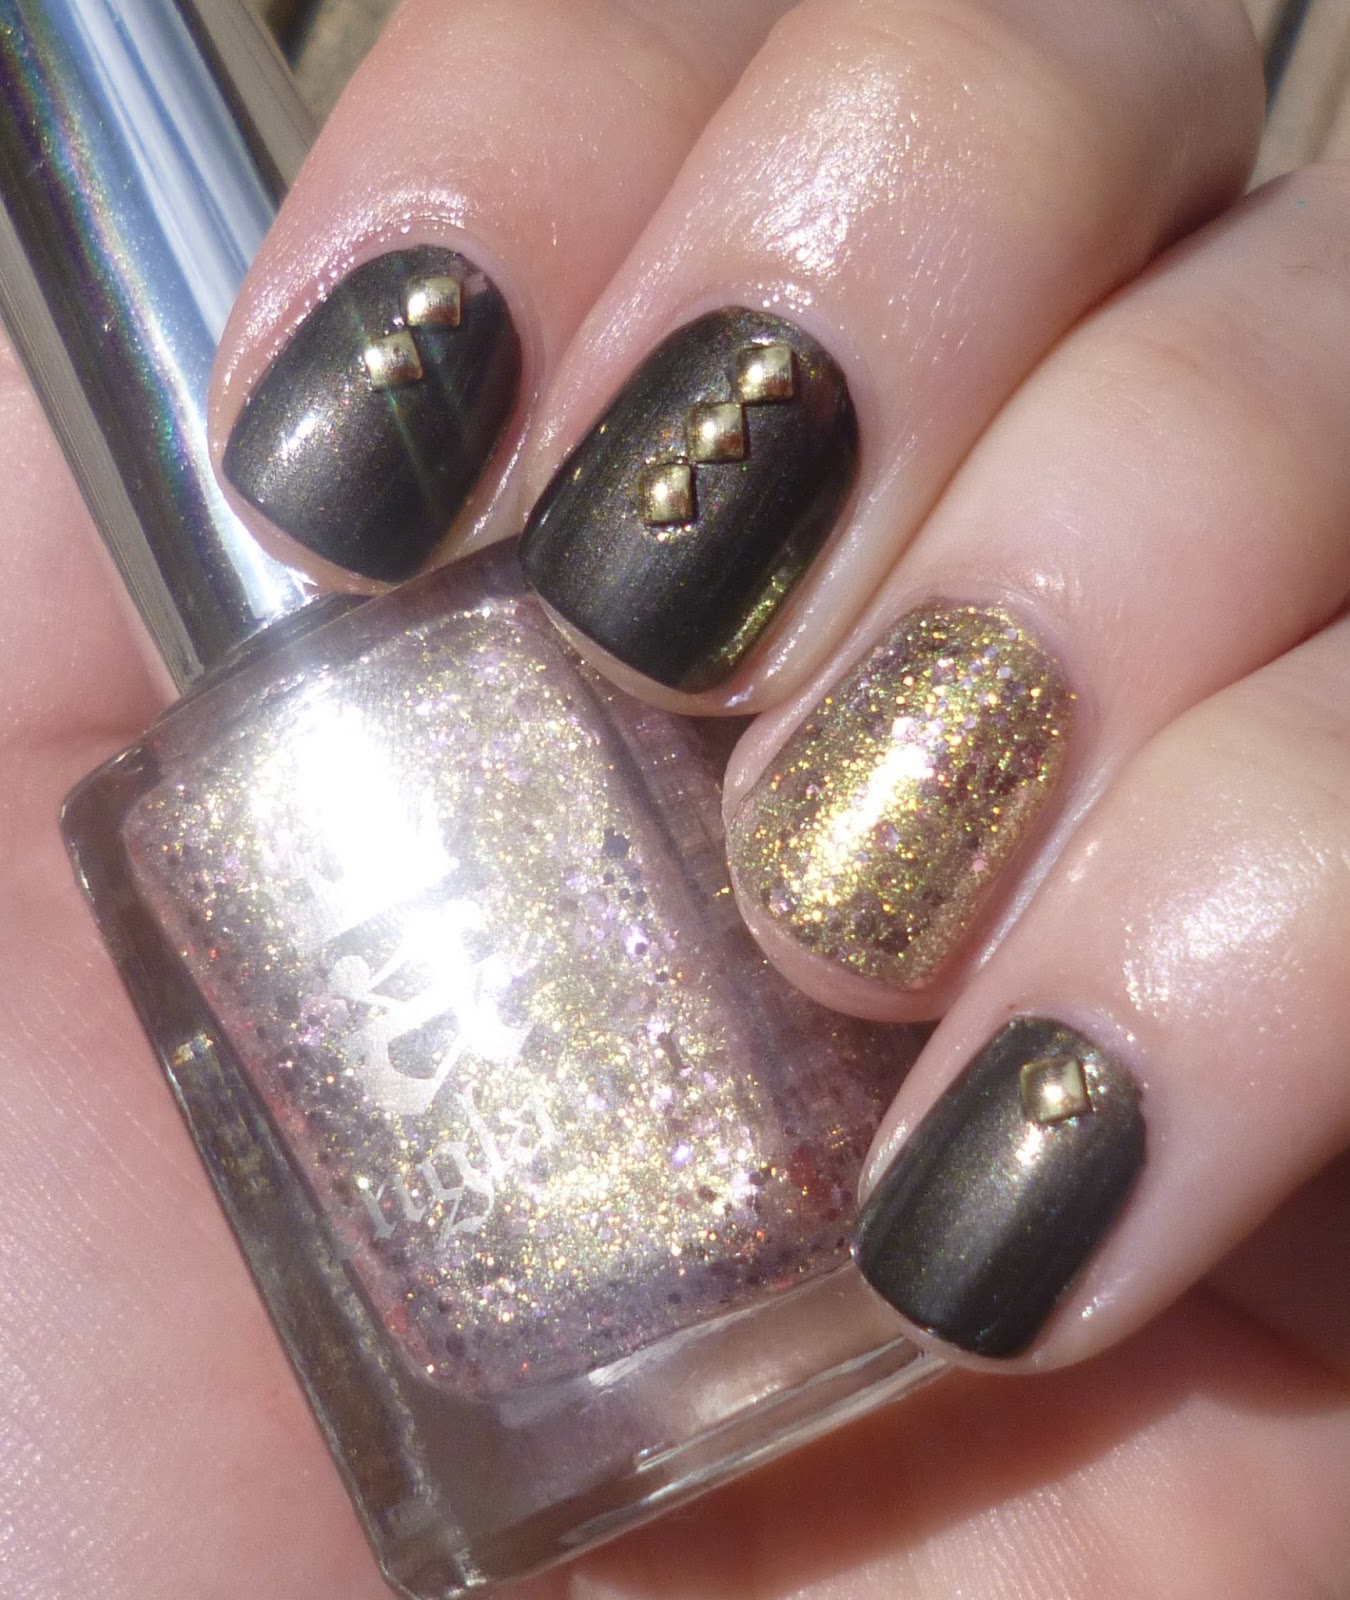
Last but by no means least is Caz...
Caz is the only other girl in this group who always wear nail polish so I decided to add an accent nail and some small embellishments to make a nice change from her everyday nail look.
I used two coats of Ciate Jelly Bean as the base. Its a really pretty pink with the perfect amount of lilac shimmer. I then stamped a pretty flower pattern in Gold Foil from plate BM 225. To create the accent nail I just added three perfect little gold studs.
So there we have it, one happy little group of polished princesses :-)
I have another nail party planned for a few weeks time with our come dine with me girlies - so I cant wait for that.
Louise xx