Friday, 19 October 2012

Zig Zag Tips

Happy Friday loves!

Hope you are all doing well and looking forward to fun filled weekends?

I have been dying to use these gorgeous Orly polishes since I treated myself to them a few weeks back. Today I decided to steer away from stamping and used my new zig zag tip guides to create something pretty instead.


These pretty colours are from the Orly Cool Romance collection. The mint green is called Jealous, Much? and the charcoal grey is called Steele Your Heart. Both have really great formulas and dry to a fantastic finish. I looked the Cool Romance collection up online and realised that there are 6 polishes in all, I jumped on ebay to see if I could purchase the others and found them selling for £20 each. Bit too steep for me so I will just stick to these for now :-).


These pre cut zig zag tips were super easy to use, I started by painting all nails with two easy coats of Jealous, Much? I then taped off the tips on each nail and using Steele Your Heart I painted the tips on each nail apart from my traditional ring finger accent nail. For this nail I decided to paint the lower section and leave the tip mint green.


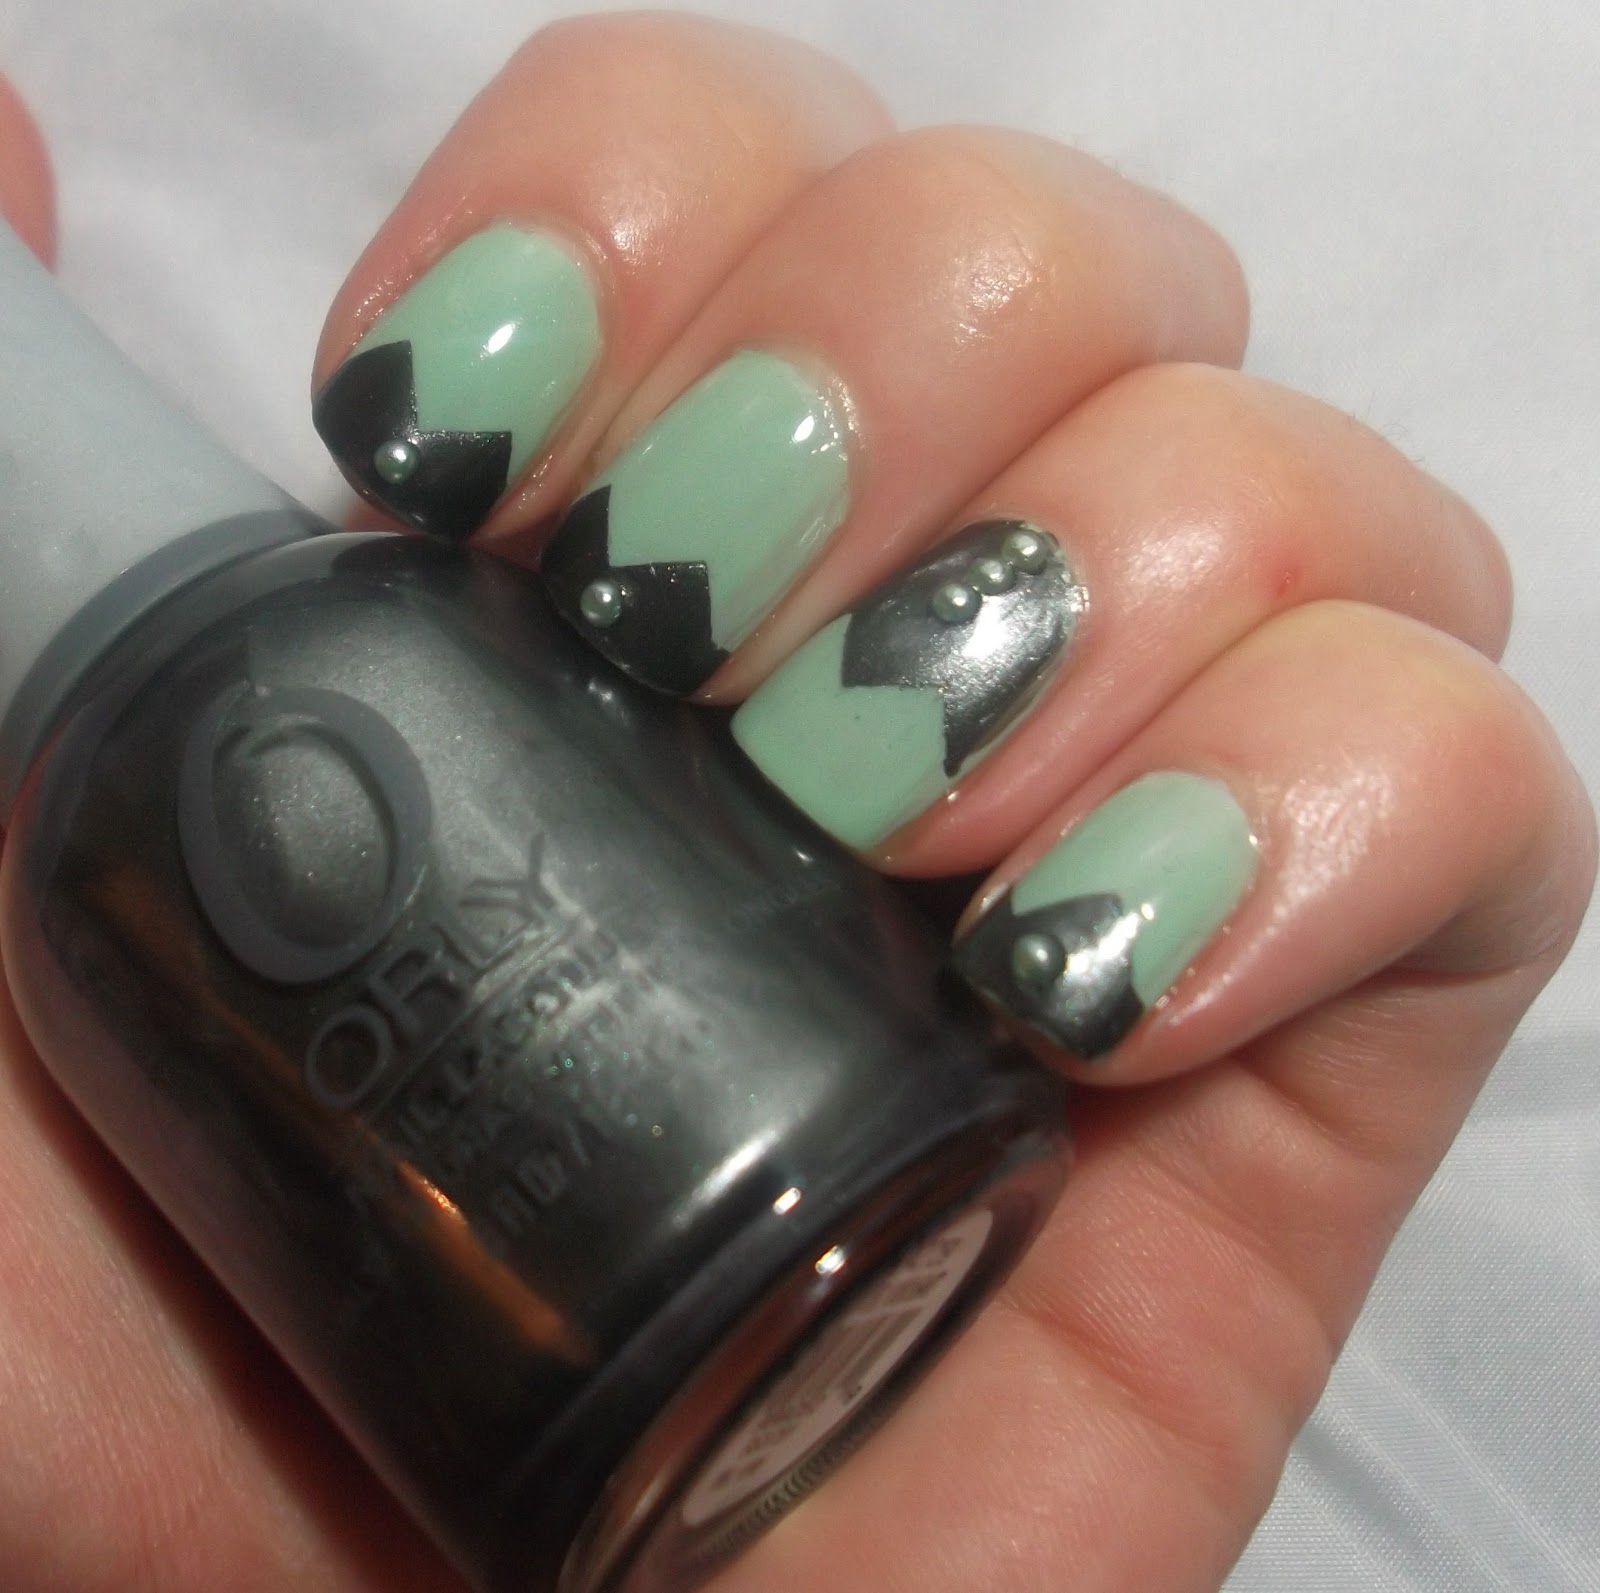
For added cuteness I applied some flat back mint green pearls with the use of my orange stick and top coat. I love these little pearls and cant wait to use them in more manicures.


I am really pleased with how thes turned out and I love these two colours together.

We are now off to Nando's for tea with friends - what do you all have planned for this weekend?

Take care

Louise xx

Thursday, 18 October 2012

Magnetic Nails - Grey

More magnetic nails... :-)

I know I said I didnt really like magnetic polish but after the success of the new Barry M Green Magnetic polish recently I just could not resist this lovely sparkly grey version.

Again this is part of the second collection of Barry M Magentics and the quality of this polish is so much better than the first four released earlier this year.


This polish is Barry M Magnetic Multi Sparkle. The name really could not say it better... just look at how striking the magnetic effect is with these polishes! The amount of sparkle added to each little bottle is fantastic and really comes to life under artificial light.


I added this cute little butterfly accents using Konad White and a small design found on plate M78.


I was so pleased with this design that I kept waving my nails under colleagues noses at work in order to get them to pay special attention to the magnetic design and all that pretty sparkle. I will wear this polish again and again. I am so pleased I gave Magnetics a second chance.

Louise xx

Wednesday, 17 October 2012

New OPI with Animal Print

Its arrived... OPI Skull and Glossbones :-).

Frustratingly I have to order OPI polishes from the States in order to get them for a reasonable price. OPI is a UK brand, which just makes it even more frustrating, but I have found an online US seller who can deliver to me within a week, not to mention at £5 per bottle cheaper. I really can't complain about that!


This manicure is three coats of OPI Skull & Glossbones, with two coats of Color Club Ulterior Motive for my accent nails. Skull & Glossbones is part of the Pirates of the Caribbean collection from OPI and is a really pale grey beige creme. This will be a beautiful base for lots of future artwork.


Ulterior Motive from the Keep It Undercover collection is a fantastic jelly style polish which sits somewhere between pink and purple. It is packed with purple and blue micro glitters and sparkles fantastically in almost any light. I love the formula of this polish :-).


I stamped the leopard design over Skull and Glossbones using my W7 Black and Konad plate M57. For the added sparkle factor I then dotted the centres of the leopard print with more of the fantastic Ulterior Motive.


I am really pleased I finally have this OPI polish in my collection. I am totally in love with at least six of the new OPI Germany collection polishes so I will be placing a new order to the US seller in the not too distant future!

Louise xx

Tuesday, 16 October 2012

Magnetic Nails - Green

In one of my recent posts I said that I didn't really like magnetic manicures and that I was glad I had used the polishes I own for stamping rather than magnetising.

All that said I couldn't resist picking up this stunning green Barry M magnetic polish in a recent 3 for 2 promotion. I really am a sucker for green :-)


This is Barry M Magnetic Green Sparkle. Putting it simply its magnetic, its green and its sparkly! This polish is part of the second release of Barry M Magnetics. I own the first four polishes that were released at the height of the magnet craze and they are no where near as good as these more recently released magnetics.


I applied one medium coat of Green Sparkle and let it dry completely. I then applied a second medium coat to one nail at a time, holding the chevron magnetic just above each nail for 10-15 seconds. The chevrons appear in the first few seconds but I held the magnet in place for longer to increase the sharpness of the design.


These pictures were taken before I applied top coat, again this is to preserve the edginess of the magntic pattern.


Isn't the sparkle in the polish just magical? I have to say I really love this look and considering you can achieve it all in such a short amount of time this is the perfect manicure for those 'I am in a rush' days!

Louise xx

Sunday, 14 October 2012

Glitter Jelly Sandwich with Feathers

This has been on my to do list for ages. I have been lemming after this Konad feather stamping plate for a while but as they are quite expensive I usually try to steer clear and just buy the Bundle Monster plates instead.

For all of those who know me you will not be surprised that I gave in and bought the plate just for this tiny little feather stamp. I love feathers :-)


This gorgeous little mani is made up of many layers so it took a while to create and a while to dry but I dont care because I love it :-)


I started with two thin layers of Barry M Strawberry Icecream. This is a thin jelly like pink polish that has been a favourite of mine recently and I knew it would be good to use for this jelly glitter sandwich.


I thin added one thick coat of Barry M Holographic. This is a really pretty holo hex glitter suspended in quite a thick clear jelly base.


To create the jelly sandwich I then topped this off with one further layer of Barry M Strawberry Icecream, which hid the holo effect and made the glitter look matte silver.


Finally I used Konad White to stamp these adorable feathers at varying angles and voila... one pretty pink feathery creation :-)


I am so in love with this look. I hope you love it too :-)

Louise xx

Saturday, 13 October 2012

Pink and Purple glitter explosion

Hi lovelies

I hope you are enjoying your weekends so far? It is my Dads birthday today so we went out for a cooked breakfast this morning and then did a little shopping to help spend his birthday money :-)

I worked on these nails last night and although this was very far from my original nail art plan they did end up being pretty, girly and fun.


I started by applying three thin coats each of these two little cheapy polishes I got in a set fom Primark. Of course the quality is not great but the colours are vibrant and at £2 for 4 polishes you really can't have too many complaints.


Using two glitter polishes from my favourite budget brand BYS, I then layered over the Primark polish to hide any last brush marks and thin patches.


Once the glitter was dry I then used Barry M Silver Foil to stamp the explosion lines from plate BM 301.


I didnt wear this mani for too long as it was a little sickly sweet for my liking, however the glitter was really striking and these nails got lots of compliments :-).

Do you like glittery polishes?

Louise xx

Friday, 12 October 2012

Black Roses on Pink nails

TGI Friday!!

When I was designing this manicure I had in the back of my mind that I had to wear this look for two full days and one of those days included an important customer facing meeting at work. The pressure was on and I ended up sitting in my nail room for a good 30 minutes just staring at all my heavenly little bottles of polish. Loads of gorgeous colours jumped out at me but they were all very bright and bold and did not feel quite right for the look I needed. I finally settled on a popular combo... pink and black.

  
To create this manicure I started with three coats of Barry M Strawberry Icecream. It really is a pretty colour and has been a great base for many manicures of mine in the past. I originally planned on stamping in Presto Pink by Sally Hansen but the pink on pink combination was just too subtle for my liking so I reached for Barry M Magnetic Dark Silver.

I read online that the magnetic polish ranges are great for stamping as they are heavily pigmented. I was pleased to discover that is totally true. I am not a huge fan of the magnetic manicure look so to find a better use for these polishes suits me just perfectly.


This large rose print is one that you will have seen here on my blog before and you will definitely see again as it really is one of my favourites. The Magnetic Dark Silver looks black on these pictures so I think it must be the magnetic particles that are silver and as I didnt use the magnet you cant see them!


I didnt love this manicure as much as I wanted to but you cant love them all :-)

Have fantastic weekends.

Louise xx